My favourite subject. I have spent so much time over the past 3 years trying to photograph these animals and get images of them that just do them justice. It has been a long slog, majority failure but with some successes that have driven me foreword. Learning their behaviour and the fieldcraft to get the shots has been more important and more beneficial than any gear I could own. The fast aperture and high frames per second along with good iso performance of any camera mean nothing if you can’t get close enough without disturbing them. This has taken a lot of time to build up and I am nowhere near perfecting it. My impatience and excitement always get the better of me and I end up cursing myself afterwards, why I didn’t just hold out that extra minute before moving, releasing the shutter or stepping out from cover? Here I will try and explain what I have learnt so far, it is not an exhaustive guide but it might help someone some small amount.

Roe Deer in the South Downs - Chichester. I knew a number of different Roe deer would hang out in this field at sunset. The field’s topography allowed for a perfect silhouette to be made against the setting sun. All i had to do was position myself and wait and the deer came running. Photographed from a footpath.
Location and Patience. There are two main things I have found that help with photographing Roe deer. Location and patience. Location is such a contributing factor, this will determine if the environment in which you photograph the deer will be photogenic, whether the light will be good enough at certain key times of the day (sunrise and sunset – both when cloudy or sunny) and whether there are enough deer so that you aren’t waiting far too long before seeing any deer (if at all!). you have to be patient with finding a good location because the better the location the less patient you have to be once you set up, more deer means less waiting time, a more photogenic location means more angles to photograph from and possibly the inclusion of additional complimentary factors (wildflowers, rolling hills, nice sunset).
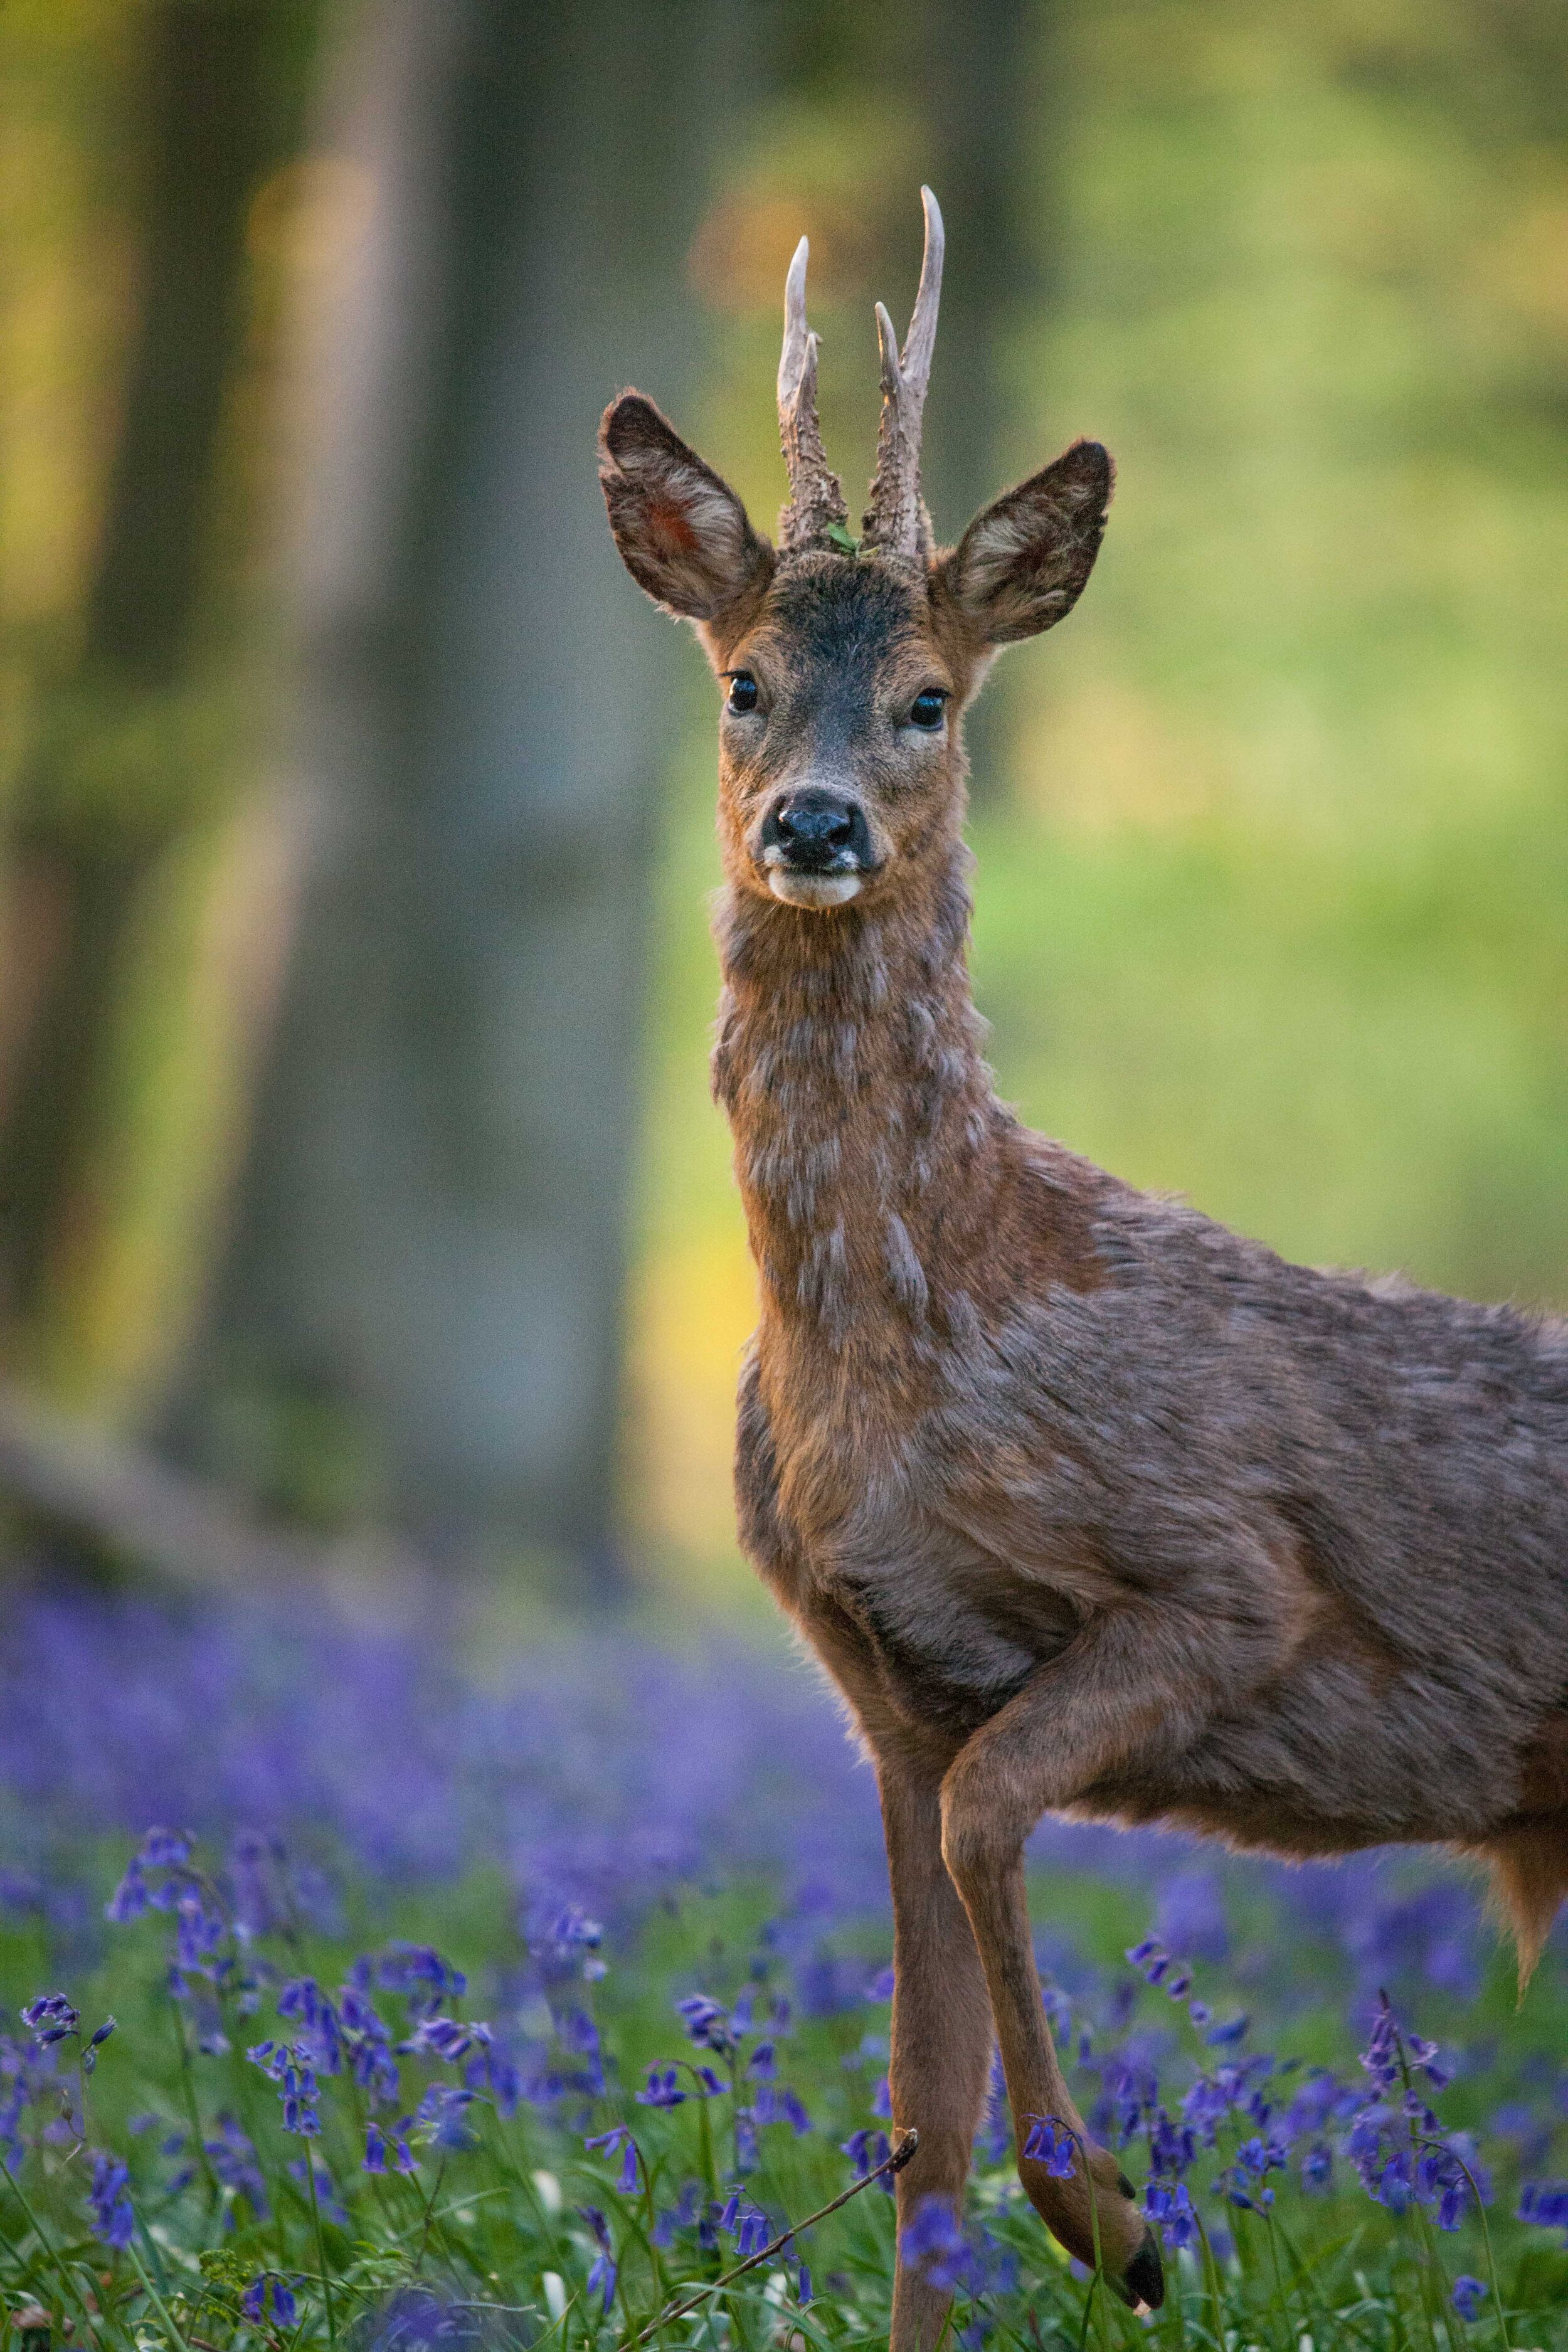
Roe Deer in the Bluebells - Chichester. Shot at 3200iso f6.3 this is the max my camera would go. Knowing a location with bluebells with a high enough density of deer was key for this shot to happen, all i had to do was wait (2 weeks of evening in the same spot). Photographed in Access land.
So how do you find a good location? Firstly, look as close to your home as possible! The quicker you can get out there the most often you will go and the more time you can spend there. This also just helps because photographing locally is always nice – in my opinion. the most common place you will find roe deer are in fields with undisturbed woodland nearby. I say undisturbed but also rarely frequented by dog walkers or walkers in general. This means the deer aren’t so skittish but also will follow similar habits most days which in turn means they might be semi predictable. How do you find these locations? The best place to start looking is google maps, this typically has nearly up to date satellite images and you can see the lay out of the fields and woods and guess what time they will be good for, sunset or sunrise? It is also good if 1) it is access land, this means you can walk all over it to your hearts content and photograph whatever you like where ever you like on it – this is a perfect situation, moors, heathland, MOD land (most of the time), woodland is usually access land or 2) footpaths this at least gives you access along the footpaths and if it is a well-positioned footpath (running through a crop field or alongside one) you can set up on it and still have amazing angles. Both of these situations I utilise to the full. 3) permission to access land – this is a golden ticket and if you can get this then you are away free but not available to everyone.

Roe Doe in the Wheat - Chichester. I had seen the Roe running about in the wheat i knew it was distracted. I was downwind and it was paying attention to me as i moved along a footpath that doubled as a tramline until i came to intersecting tramline that the deer was jumping across. I set up at the intersection and waited until it came into view. It saw me and moved closer allowing me to get this shot.
The next step is to visit the location, see for yourself the lay of the land. Take your camera and test angles, test background bokeh, complimentary backgrounds, shades, nice foregrounds, slight changes in elevation in the fields topography that will help/hinder any photograph you hope to get. Also if you visit after 18:00 you may even see deer! This is ideal, because then you start to build up an idea of where they like to feed/hang out. What I have found when photographing Roe is that they are creatures of semi habit – this also depends on the individual. But they will often frequent the same exactly stop for a few evenings or at least be within a stone’s throw. So once you have visited the same location a few times wondered around it at 18:00+ hours then you will notice the locations the deer pop out in. this is where you want to set up and test your angles. Arrive earlier then when you see the deer maybe 18:00 is fine, I typically go out 18:30-19:00 to set up but in the height of summer this can be too late still and in winter it is wayyy to late (its already dark). Then once set up just wait. Wait, wait, wait, wait, wait. Phone signal helps, a beer even more as it means you are quiet, still and not fidgeting, but also keep an eye out.

Roe Buck in the Wheat - Chichester. Photographed from a footpath running alongside a wheat field.
You want to be aware where the deer comes from, when it does pop out and also which direction it is going in. Wait for it to be comfortable out in the open (this is the hardest bit) before releasing the shutter. Do it slow and progressively. If you hit it with a burst of full frame, 10FPS immediately it will spook and run. You want to ease the shutter sound into its life… which is hard but worth it. Also, if you are still and the deer is walking in your direction, stay still it will be used to you and can get incredibly close. I have found that edging closer has only helped in about 1/10 situations while staying still helps in about 2/6 so staying still usually pays off so the benefits of both have to be weighed up massively.

Roe Buck Silhouette - Chichester. Photographed from the edge of access land looking out over an open field.
Once you have a good location and know the deer are then it is only time before the good shots start rolling in. If you have got good light and a good location there is no need for a fast aperture, high iso or fast FPS or FF. A crop sensor on a 300mm lens will give you 480 equiv which is enough. The fieldcraft and investment in a location will pay off more. I typically shoot deer on a 1dsiii/1div with the sigma C 150-600mm f5-6.3. This has offered me the ideal set up for getting the images I am after. The longer focal range certainly helps with those tight in portraits but for environmental shots I find myself zooming out. I hope this has helped and I hope you have enjoyed the photo of Roe accompanying this text.

Roe Doe in a freshly mowed hay field - Chichester. Taken from the edge of access land into an open field.